Showing posts with label IN-2-IT. Show all posts

Thursday, 1 March 2012

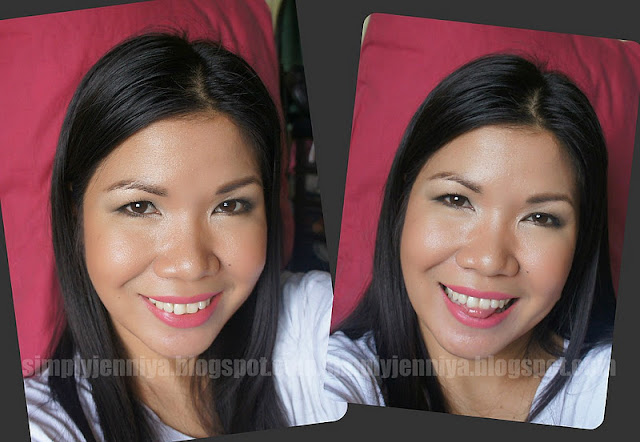
FOTD: Green is the color of the day by LOUJENE


Shirt by St. John's Bay

Last Sunday, I get bonded with my in-laws. I don't often see them and I get flattered when my Mom-in-law said that my skin is glowing and I'm looking fairer compared to the last time she saw me. I said that we intentionally don't go out under the sun nowadays because we wanted to get a nice line of tan this coming summer. Lol!

For today's post, I've used for the very first time a lovely make-up palette from LOUJENE - a Japanese make-up brand.

LOUJENE


For this look, below is the lists of the products that I've used.

For the face:
- Myra Daily Sun Protect Facial Moisturizer SPF 15
- Palladium Natural Rice oil-absorbing rice powder

For the eyes:
- LOUJENE 9-colors eyeshadow palette
- NYX eyeshadow base
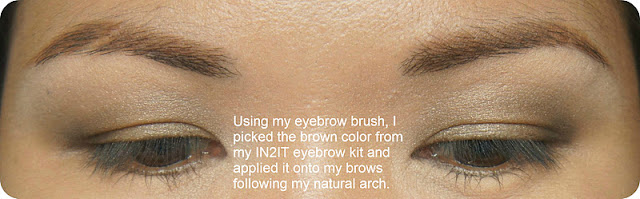
- IN2IT eyebrow kit
- ELF eye widener pencil in Pearl
- Maybelline Hyper Curl Volum Express mascara

The eye shadows are shimmer wash and some are semi-mattes. Love!

I love earth colors!

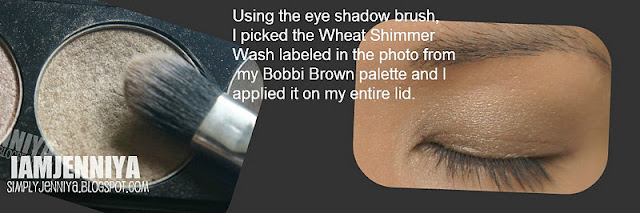
1. I applied it all over my lids up to the brow bone.
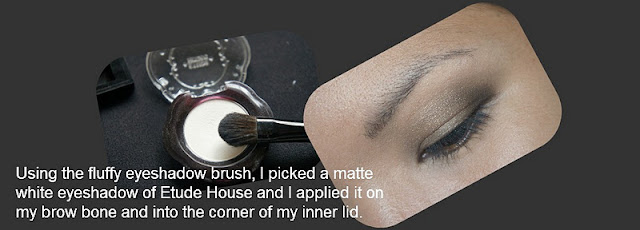
2. I applied it in the inner third of my lids just up to the crease.
3. I applied it on the outer part/ outer-V of my lid.
4. I applied it in the inner corners of my eyes on top of the ELF eye widener in Pearl.

Fyi, I applied my Bobbi Brown in Espresso to darken my outer-V.

For the cheeks:
- Avon lip & cheek tint
- NYX Blush 

For the lips:

I combined the two (2) shades of the lipsticks. I applied first the Wet 'n Wild, and then I blot it with tissue. I did it twice for the Noveau Pink. Next, I applied the Ever Bilena on top of it. 

Nice result of the combi, eh?


XX,


Thursday, 29 December 2011

Tutorial: Simple Everyday Make-Up


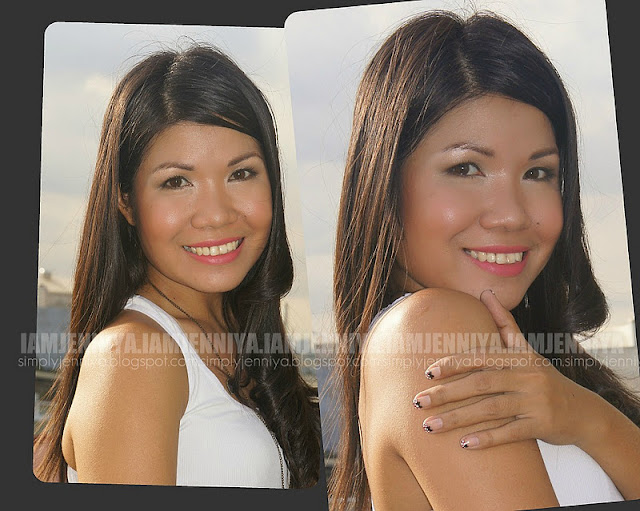
I posted the other day the ways on how I wore my basic white top and I came up with a simple make-up also to match with my outfit. Today, I am going to share with you the make-up tutorial on how I came up with this look. I actually just used two (2) color of eye shadows (a lighter shade and a dark shade) in this tutorial to justify the post title about a simple make-up.
A Simple Make-Up

Here are some products I've used in achieving this look. 

The step-by-step instructions:
Step #1. I skip with the moisturizer because I used my Etude House BB Cream in Refreshing. I squeezed out from the tube a small amount only and using my slanted foundation brush, I applied it evenly onto my face.

Step #2. I set my BB Cream by applying my IN2IT two-way foundation over it using my powder brush.

Step #3. Eyelids!
Apply the similar eye shadow color you have (it's like a mix of green & gray) using any small eye brush from the outer to the inner 3rds of your lower lash line.

Step #4. Crease!
Apply also any very dark brown eye shadow you have (provided it is matte) using a bullet brush from the outer to the inner 3rds of your lower lash line.

Step #5. Blend! Blend! Blend!

Step #6. Brow bone!

Step #7. Eye brows!

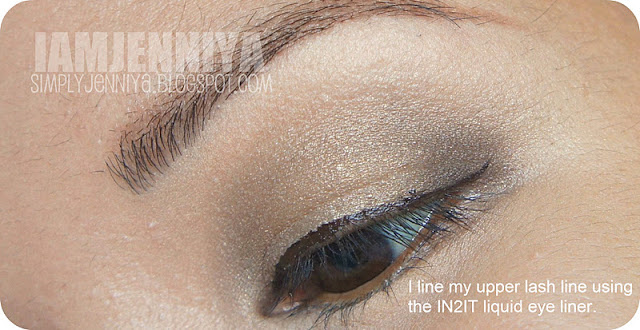
Step #8. Lash line!

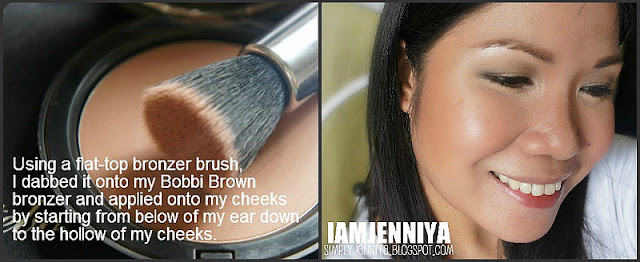
Step #9. Contour!
Then, bring it up by stroking at the sides of your face to create shadow that will give an illusion of slim face.. I also contoured my nose using a big eye shadow brush. Do not forget your jaw line also. To make it more natural, I stroke the remaining product in the brush lightly on my cheeks.

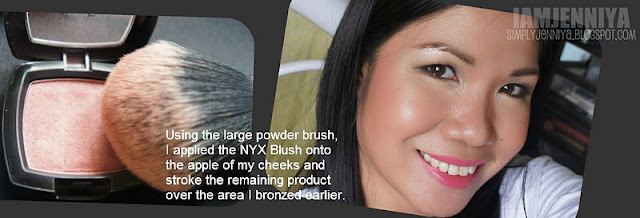
Step #10. Blush!

Step #11. I applied a very small amount of champagne eye shadow mixed with a Stila in Moonlight eye shadow onto the corner of my eyes to make my eyes pop more and to make my face look even brighter. 

Step #12. Curl your lashes and apply your favorite mascara. I used Maybelline Volum Express.

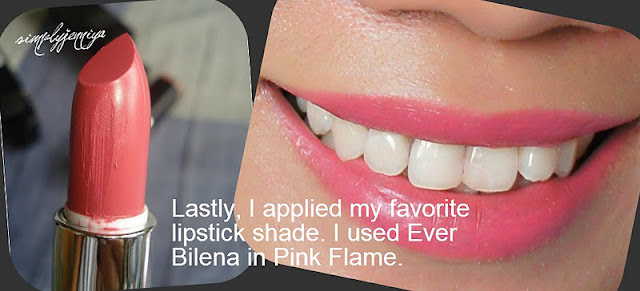
Step #13. Lips!

And you're done! Here are some bonus photos before I get my hair curled and get ready for the photo shoot with my hubby.

This make-up is perfect for an everyday wear to work. Skip the contouring and bronzing steps, I really find this make-up look just so quick and easy to do. Talk about NARCISSISM, I hope I didn't get you bored with all my faces. 

I hope you find my make-up tutorial helpful.

iamjenniya

Monday, 1 August 2011

Face It: GREEN SMOKEY EYES


I spent my rainy and cold Sunday at my Mom's house. It's been long time since our last visit. Before we headed to their house, we dropped by at Greenhills Shopping Center to do a little bit of shopping and bought pasalubongs for my family. Yesterday, I rocked my Sunday with my Green Smokey Eyes and in this post; I will be sharing a tutorial on how I did it.

Green Smokey Eyes
I seldom do Smokey eyes because I always messed up and I cannot do a real nice one. But yesterday was considered a masterpiece (in my very own opinion hehehe) because my Smokey eyes rocked. I have learned other techniques or rather easy steps to create Smokey eyes without spending a lot of time creating a nice smoke one than resulting to horror, lols!

So, let's start beauties!

Prep your face.
Apply your moisturizer. After your skin absorbs it, apply BB Cream (well, this is optional). I used my angled foundation brush in applying the cream onto few parts of my face. Please see below my bare face with a pattern.
 
I do not apply BB cream all over my face because I don't need to. The patterns you see in the photo are most likely the temple parts that should be bright than the other parts because those parts are usually first seen by the people. Also it will give nice results in photos.

Then, using a large powder brush, apply your powder to set the cream and apply onto your whole face and don't forget your neck area.

Transform your eyes (refer to the photos).
 
These are the items I've used in creating the green Smokey eyes. You can choose a color of your choice. You just need 2 colors of eye shadows; a dark and a lighter one. 

(No.1) Apply eye shadow base. I used my fingers in applying my base to make the product warm. 
(No.2) Line your upper lid with a black pencil eye liner. Then, take your small brush, and smudge the pencil shade; brush it upwards.

 (No.3) Using flat eye shadow brush, this is optional, I pat on first the black matte eyeshadow then I apply the dark shade (Exotic Green) onto lids following the form of your eye socket. 

 
(No.4) Using a fluffy eye shadow brush, take a lighter shade (Mermaid Green). Close your eyes and gently poke the brush onto middle of your eye socket. Gently deepen your poke and slowly half-open your eye. Then, start sweeping your brush side by side to your inner corner to your outer corner of the eye.

 
Do it also on your other eye. See how the eye shadow smoked-out? It was neat and blended.

 
(No.5) Using again your fluffy eye shadow brush, apply your highlighter onto your brow bone and sweep it below your eyebrow down to your inner corners. Sweep softly to blend.

 
(No.6) Define your eyebrows. In my case, using a slanted eye liner/ eyebrow brush, I used an eyebrow powder kit.

 
(No.7) Line your lower 1/3 lash line with black eye pencil (its okay if its messy) starting from the outer corner of your eyes, then use a cotton bud to smudge the pencil shade.

 
(No.8) Using a small brush, apply the lightest shade (Mermaid Green) to set it.

 
 Use a Q-tip for a nicer smoke.
Line your upper and bottom waterline with black eye pencil.

 
(No.9) Curl your lashes and apply your favorite mascara. I apply 3 coats of very black mascara. Don't forget to put any shimmery white eye shadow in your tear duct area to pop your eyes more.

Here are shots of the finished product:
 
Semi-closed eyes
 
Half-opened eyes
 
Full-opened eyes

So, now that you're done with your Smokey eyes, clean any fall-outs of eye shadows. In my case, I used my large powder brush again with a powder on it and I brushed out the fall-outs. 

Next thing is the rest of the face. Below is the photo of the products I've used.
 
(No.10) Apply your favorite blush on. I used Spice of NYX.
(No.11) Line your lips will natural color.
(No.12) When you do Smokey eyes, it is best to have nude lips. Apply nude lipstick. I used Blush of Revlon Colorbursts Lipstick.
(No.13) Top it off with a nude lip gloss also. Apply it in your lower middle lips then pout once.

I have no available any green tees to wear yesterday but I think this blue green tee worked anyway.

Hope this tutorial helps. Until my next post beauties.

Much love,

Jenniya

Tuesday, 26 April 2011

NEW BEAUTY FIND: IN2IT "BALLOON BRUSH" MASCARA

I know, it's been a long time already since my last post. Blame it all to the work and the busy schedules. I still have a hang-over of the long-weekend vacation, so I have the reason to write now. By the way, how's your Holy Week? Did you go out of town or just stayed home with your family and observe the holy week? If you will ask about me, well, I spent it with my family from out of towns and observance of holy week back to the Metro.

I would consider that this is the busiest month for me for this year because aside from work, my brother who is an OFW from KSA have arrived this April and is now having a three (3) months vacation and also my B's cousin and his family did a short vacation here in Manila from the U.S. We brought them to the attractions they wanted to see and everything turned out fine. 

I have many stories to tell but let me first share to you my new beauty finds from SM Beauty Department. I still have my Maybelline mascara but I really cannot resist not to buy this cute "balloon brush" mascara from IN2IT. It's so cute that really fits in my kikay kit and which I can tote around anywhere I go. 
 
Isn't it so cute? The packaging, the color, the size? Hays.. I love it!

Yup! It's a balloon brush. The spikes are so soft and it coats each lash separately resulting to have an extra-length looking lashes. This is like their fibre mascara that I have tried on before that gives extra length to my lashes but the downside of that fibre mascara was it dried up immediately. I don't know with this balloon brush mascara how long will it last before it dries up. We will see then.

That spikes are made of rubber so that's why it's so soft. No worries if you accidentally poke your eyes hehehe. 

 
Yey! The price tag is just right with the size of this tube.

I've already used this balloon mascara for awhile now and I would say I saved time in putting on my make-up because when I'm in a hurry, I just curled my lashes and get out of the house and I do put on this mascara inside the car. The wand is so handy and I can manage to control it in my hands even the car is moving. That cute balloon brush is really a wander because even at the very peak of the traffic in EDSA where  hubby always hit the brake most of the times; it didn't messed up when it applies.

Okay beauties, that's it for now. I promised to go back with my regular blogging starting this week. 


Much love,