Showing posts with label Maybelline. Show all posts

Tuesday, 30 April 2013

Review: Maybelline Clear Smooth All-In-One Shine Free Foundation


I found myself one day at Watsons holding this Maybelline product and secretly scrutinizing it. I ran out of my favorite oil-controlling powder and unfortunately, my shade was out of stock when I went to Beauty Bar Shangri-La Mall. So, I ran to Maybelline. Since my plan is to use this temporarily, I settled for refill only.

The Product


MAYBELLINE Clear Smooth All In One
Shine Free Foundation (Refill) in Natural

The packaging. 

There's a puff included. No mirror.

There's also a transparent plastic over the powder.

This product claims.
Shine Control. Blend of water & sebum repellent powders, keep skin matte and wonderfully fresh throughout the wear.
High UV Protection. SPF 25, among the highest in sun protection, shields from skin darkening, with PA++ for added protection.
Instant Fairness. Infused with pro Vitamin C, it instantly makes skin look fairer and more natural.
Dark Spots Blend Away. Ultra-fine powders and coated pigments effortlessly cover spots for fair and even skin.
Long Lasting. Breathable and lightweight, make-up stays true and even throughout the wear.
Visibly Smooth Complexion. Silky soft texture glides to visibly even out skin's surface for a smooth complexion.
Conceal Blemishes and Pores. Blemishes and pores are instantly concealed trace less. Skin looks flawless.
Tone Perfecting. Developed for South East Asian skin tone, each shade blends effortlessly all over for a natural non-cakey finish.


Product Swatches

Very fine texture.

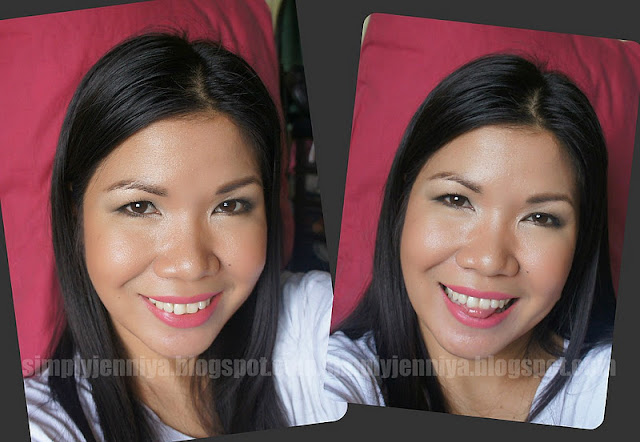
Left: with flash; Right: without flash.
When you blend it...

Totally blended and it set so with my skin tone.

I like:
... It has SPF 25.
... Silky soft texture.
... Cute and sturdy packaging.
... It is hygienic because of the transparent plastic over the powder.
... The size is travel friendly.
... Light weight.
... Nice coverage.
... Non-cakey.

I Don't Like:
... The puff included smells rubber.
... Oil control power is not maximum but least.


Jenniya Say:
To start with, I have oily skin. So, anything that controls shine really attracts me. I don't know if it's just me but every time I buy oil-control products, I spent long minutes reading what it claims and I'd read it again and again. Sometimes, the more the product benefits are well-described and sounds convincing, the possibility is I'd certainly buy it. Like this Maybelline Clear Smooth All In One Shine Free Foundation, I admit the product benefits written really gets me to buy it. I was torn between the shade of Warm Beige and Natural but I took the latter instead. I do not see any tester because the items were displayed on the display rack together with the other brands. I know they have testers at the Maybelline counter but laziness got me and I wasn't in the mood to hear any magic spiel recited by any sales assistant that time. Good thing I took the Natural shade because it perfectly match my skin tone. Great.


The photo above clearly explains how this product worked on me. When I applied Maybelline Clear Smooth Foundation onto my bare face (I just applied moisturizer and no primer at all), I didn't use the puff. It is not because of the strong smell of rubber (because I washed it already with a baby shampoo) but I really prefer using my large powder brush in applying my powder. The powder sits on the pores that way and will give you in the initial hours a semi-pore-less face. 

I love the coverage of this foundation because even I didn't apply the powder generously, my face still achieved the matte, instant smooth and natural looking finish. My pores were less visible, too. The blemishes on my forehead were concealed and the redness on my face was gone. I am impressed. This is perfect to those who doesn't want their face looking so made-up.

Note that I stayed in a non-aircon room with just a fan on when I tested this foundation and took these pictures at around 3:00 P.M. Under a humid weather, my oil started to come out and I started melting after 2 hours. It's my time to shine again. Lol. That's how oily my skin is. As you see, it started to give me a dewy-like finish. I wish it will stay as dewy like that but my oil is fond of embarrassing me and I can't control it. I have to blot my T-zone area and re-apply the powder again before I totally melt. Though the shine control lasted for every 2 hours only for my uber oily skin, I get back its deficit by leaving me a smooth complexion and natural looking skin every time I retouched. If you apply a face primer, then you will surely enjoy a maximum staying power of shine free face. I haven't tried this in an aircon room though. This product will perfectly work to those who are blessed with normal and not so oily skin like me. 

I love that it has SPF 25. With the weather we have now, the sun is very unforgiving. Make sure your skin products are armed with SPF. You don't like to get burn and deal with wrinkles at early stage, do you? This baby have found a space in my beauty bag. Meant that I like this product and I've been using this for many times already whenever I attend mass, going to supermarkets and when I have urgent appointments and have no choice but to do my make-up in a moving car; I can always rely on a compact like this.

Jenniya rate this product:
4 out of 5. Good.

Maybelline Clear Smooth (refill) is retail at Php159 while the compact is at P249. Available in 4 shades. You can buy this product in all Watsons, SM Dept. Store and all other leading stores.

Have you tried this product? 

Follow on Bloglovin

XX,


Follow & Like me on BloglovinFacebookTwitter & Instagram.


Sunday, 14 April 2013

IamJenniya's First Blog Giveaway (CLOSED)


When I started blogging, I used i.ph and WordPress. I wrote my day-to-day life there. It was like a personal diary only because I never put pictures. I wrote my rants most of the time. It was my way of releasing my anger in certain things that didn't happen according to my liking.

Then, one day, my Mom asked me to buy her tools for nail art. I never found any nail art tools and nail art polishes in Watsons before, so I googled where I can buy here in Manila. I found KONAD Stamping Nail Art and Pretty Nails from AskMeWhats (Nikki). I met Nikki in person when I picked-up the items I bought from her somewhere in Ortigas Center. In short, that was the start I got hook to beauty blogging. I started to blog about make-up last April 2010 and the local beauty bloggers that inspired me to shift my personal rant blog to beauty blog were:

1.) Nikki - I printed her nail art tutorials and gave to my Mom for guide;
2.) Shen - I love her dark smokey eye tutorials and lipstick swatches;
3.) Liz - I discovered her blog through Lauren and I like her immediately because her blog photos are clear and she is efficient and dedicated to blogging.
and of course, 4.) Lauren - She is very smart. I really love the way she writes. Impressive and she's funny. Sadly, she don't update her blog anymore.

Okay. The time has come for me to announce my first blog giveaway. Actually, IamJenniya's blog turned 3 years old this April. This is to thank all IamJenniya's readers. Honestly, I'm a bit nervous. This is my first time to run a giveaway for my blog and this is OPEN WORLDWIDE.
I wasn't an active blogger before and definitely not posting regularly during 2010-2012. It is only this January 2013 that I decided to give more focus to my blog and tried posting in regular basis but just when things started doing great, something happened that made me in a month of hiatus again. I still considered myself as a newbie blogger (hehe!), so I wasn't expecting much sponsors to take part of this giveaway (and I think it's too early to get my blog recognized). So, when I got a message from Trendsetters Fashion Boutique that they like to sponsor, I was very, very happy. Thank you so much Suzette!

So, what's the prize at stake?
Ta-da!


Since I added a bit of fashion in my blog, I got something from Forever 21 and the rest are make-ups, facial & skin care products.


 ... and there's two (2) gift certificates worth P300 or $7 (total of P600 or $14) from Trendsetters Fashion Boutique which you can use to buy their proud brands: Krave Mineral Cosmeceuticals, Human Heart Nature, and Ellana Mineral Cosmetics. Ohh... If I could only join my giveaway. Sigh*

Now, let's take a closer look to the goodies, shall we?

1 piece FOREVER 21 Leggings (size Medium). 
I bought two of this and I already used the other one here.

Asian Secrets Lulur with Green Tea and Vitamin E (135g)

L.a. Passion color rich lipstick in Baby Fuchsia

MAYBELLINE Clear Smooth Shine Free Pressed Powder in Natural

e.l.f. lipstick in Classy

3 pcs. Watsons Mini wet wipes 

MAYBELLINE Baby Lips in Anti-Oxidant Berry

Beauty Buffet and PUREDERM Facial Masks

Brand new CARONIA nail polish in Black Velvet, White Satin & Simply Red

GODIVA Natural Skin Care 
1 pc. Whitening Soap & 3 pcs. Whitening Facial Cream sachets


Here are the mechanics for you to join:
- This giveaway will start April 15, 2013 and will end on April 28, 2013.
- This giveaway is open worldwide.
- The winner will get the above-mentioned prize to be sent by IamJenniya via courier with free shipping.
- The winner can contact directly Trendsetter's Fashion Boutique for the gift certificates. I will send the electronic GC to the winner via email and will forward winner's name to TFB.
- Winner will be announced in this blog on April 30, 2013 and at the same time, IamJenniya will notify the winner via email. And because not everybody is glued to their computer and everybody have a life, I truly understand that. :-), so I am giving the winner a time to respond within 120 hours (5 days baby!) or else I'll pick a new winner.
- The comments will be moderated, so please comment only once.


Ready to join now?
1.) Be a public follower of IamJenniya via GFC (Google Friend Connect). Find Followers gadget on my upper right sidebar and click "Join this site".
2.) Like Trendsetters Fashion Boutique Facebook page here.
3.) Like I am Jenniya Facebook page here.
4.) Follow @iam_jenniya Twitter here.
5.) Leave a comment with your full name or GFC name, Facebook name, Twitter name, Email address, and answer the 2 questions below:
A. What item/s would you want to have from Trendsetters Fashion Boutique?
B. What IamJenniya posts did you find helpful? 


For more chances of winning (this is optional):
Copy and tweet this: "Join @iam_jenniya first blog giveaway and get a chance to win Forever 21, lovely goodies and gift certificates! http://iamjenniya.blogspot.com/2013/04/iamjenniyas-first-anniversary-giveaway.html

or;
Follow @iam_jenniya Instagram here.


I hope you guys join and good luck! Spread the love now!


XX,


Follow & Like me on BloglovinFacebookTwitter & Instagram.


Note: As of April 16, 4:30 P.M. local time, I edit just a little bit on the #5. I added to leave also your Facebook Name and Twitter Name. Those who have commented already with their entry on or before 4:00 P.M. 16th April, no worries as I was able to figured out your usernames. Please bear with me lovelies.

Thursday, 1 March 2012

FOTD: Green is the color of the day by LOUJENE


Shirt by St. John's Bay

Last Sunday, I get bonded with my in-laws. I don't often see them and I get flattered when my Mom-in-law said that my skin is glowing and I'm looking fairer compared to the last time she saw me. I said that we intentionally don't go out under the sun nowadays because we wanted to get a nice line of tan this coming summer. Lol!

For today's post, I've used for the very first time a lovely make-up palette from LOUJENE - a Japanese make-up brand.

LOUJENE


For this look, below is the lists of the products that I've used.

For the face:
- Myra Daily Sun Protect Facial Moisturizer SPF 15
- Palladium Natural Rice oil-absorbing rice powder

For the eyes:
- LOUJENE 9-colors eyeshadow palette
- NYX eyeshadow base
- IN2IT eyebrow kit
- ELF eye widener pencil in Pearl
- Maybelline Hyper Curl Volum Express mascara

The eye shadows are shimmer wash and some are semi-mattes. Love!

I love earth colors!

1. I applied it all over my lids up to the brow bone.
2. I applied it in the inner third of my lids just up to the crease.
3. I applied it on the outer part/ outer-V of my lid.
4. I applied it in the inner corners of my eyes on top of the ELF eye widener in Pearl.

Fyi, I applied my Bobbi Brown in Espresso to darken my outer-V.

For the cheeks:
- Avon lip & cheek tint
- NYX Blush 

For the lips:

I combined the two (2) shades of the lipsticks. I applied first the Wet 'n Wild, and then I blot it with tissue. I did it twice for the Noveau Pink. Next, I applied the Ever Bilena on top of it. 

Nice result of the combi, eh?


XX,


Thursday, 29 December 2011

Tutorial: Simple Everyday Make-Up


I posted the other day the ways on how I wore my basic white top and I came up with a simple make-up also to match with my outfit. Today, I am going to share with you the make-up tutorial on how I came up with this look. I actually just used two (2) color of eye shadows (a lighter shade and a dark shade) in this tutorial to justify the post title about a simple make-up.
A Simple Make-Up

Here are some products I've used in achieving this look. 

The step-by-step instructions:
Step #1. I skip with the moisturizer because I used my Etude House BB Cream in Refreshing. I squeezed out from the tube a small amount only and using my slanted foundation brush, I applied it evenly onto my face.

Step #2. I set my BB Cream by applying my IN2IT two-way foundation over it using my powder brush.

Step #3. Eyelids!
Apply the similar eye shadow color you have (it's like a mix of green & gray) using any small eye brush from the outer to the inner 3rds of your lower lash line.

Step #4. Crease!
Apply also any very dark brown eye shadow you have (provided it is matte) using a bullet brush from the outer to the inner 3rds of your lower lash line.

Step #5. Blend! Blend! Blend!

Step #6. Brow bone!

Step #7. Eye brows!

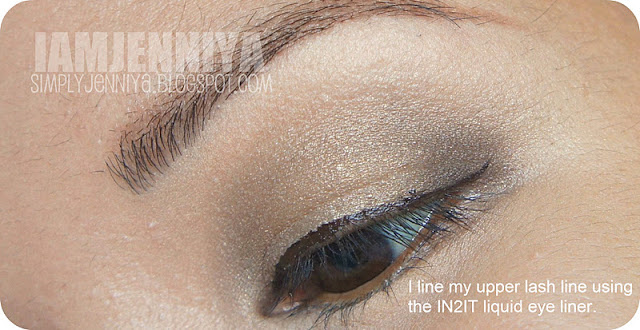
Step #8. Lash line!

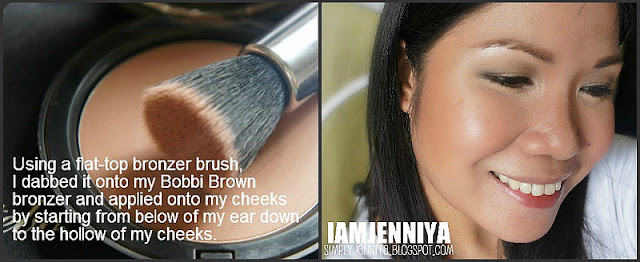
Step #9. Contour!
Then, bring it up by stroking at the sides of your face to create shadow that will give an illusion of slim face.. I also contoured my nose using a big eye shadow brush. Do not forget your jaw line also. To make it more natural, I stroke the remaining product in the brush lightly on my cheeks.

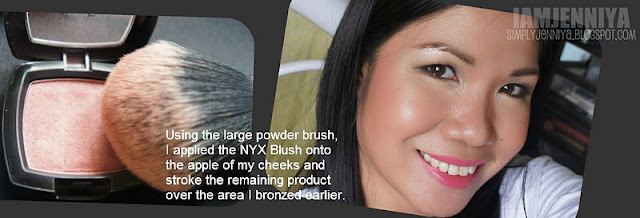
Step #10. Blush!

Step #11. I applied a very small amount of champagne eye shadow mixed with a Stila in Moonlight eye shadow onto the corner of my eyes to make my eyes pop more and to make my face look even brighter. 

Step #12. Curl your lashes and apply your favorite mascara. I used Maybelline Volum Express.

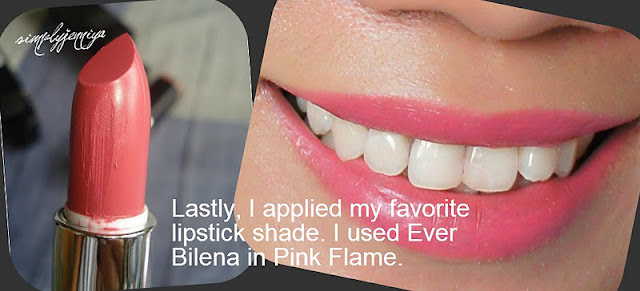
Step #13. Lips!

And you're done! Here are some bonus photos before I get my hair curled and get ready for the photo shoot with my hubby.

This make-up is perfect for an everyday wear to work. Skip the contouring and bronzing steps, I really find this make-up look just so quick and easy to do. Talk about NARCISSISM, I hope I didn't get you bored with all my faces. 

I hope you find my make-up tutorial helpful.

iamjenniya

Monday, 1 August 2011

Face It: GREEN SMOKEY EYES


I spent my rainy and cold Sunday at my Mom's house. It's been long time since our last visit. Before we headed to their house, we dropped by at Greenhills Shopping Center to do a little bit of shopping and bought pasalubongs for my family. Yesterday, I rocked my Sunday with my Green Smokey Eyes and in this post; I will be sharing a tutorial on how I did it.

Green Smokey Eyes
I seldom do Smokey eyes because I always messed up and I cannot do a real nice one. But yesterday was considered a masterpiece (in my very own opinion hehehe) because my Smokey eyes rocked. I have learned other techniques or rather easy steps to create Smokey eyes without spending a lot of time creating a nice smoke one than resulting to horror, lols!

So, let's start beauties!

Prep your face.
Apply your moisturizer. After your skin absorbs it, apply BB Cream (well, this is optional). I used my angled foundation brush in applying the cream onto few parts of my face. Please see below my bare face with a pattern.
 
I do not apply BB cream all over my face because I don't need to. The patterns you see in the photo are most likely the temple parts that should be bright than the other parts because those parts are usually first seen by the people. Also it will give nice results in photos.

Then, using a large powder brush, apply your powder to set the cream and apply onto your whole face and don't forget your neck area.

Transform your eyes (refer to the photos).
 
These are the items I've used in creating the green Smokey eyes. You can choose a color of your choice. You just need 2 colors of eye shadows; a dark and a lighter one. 

(No.1) Apply eye shadow base. I used my fingers in applying my base to make the product warm. 
(No.2) Line your upper lid with a black pencil eye liner. Then, take your small brush, and smudge the pencil shade; brush it upwards.

 (No.3) Using flat eye shadow brush, this is optional, I pat on first the black matte eyeshadow then I apply the dark shade (Exotic Green) onto lids following the form of your eye socket. 

 
(No.4) Using a fluffy eye shadow brush, take a lighter shade (Mermaid Green). Close your eyes and gently poke the brush onto middle of your eye socket. Gently deepen your poke and slowly half-open your eye. Then, start sweeping your brush side by side to your inner corner to your outer corner of the eye.

 
Do it also on your other eye. See how the eye shadow smoked-out? It was neat and blended.

 
(No.5) Using again your fluffy eye shadow brush, apply your highlighter onto your brow bone and sweep it below your eyebrow down to your inner corners. Sweep softly to blend.

 
(No.6) Define your eyebrows. In my case, using a slanted eye liner/ eyebrow brush, I used an eyebrow powder kit.

 
(No.7) Line your lower 1/3 lash line with black eye pencil (its okay if its messy) starting from the outer corner of your eyes, then use a cotton bud to smudge the pencil shade.

 
(No.8) Using a small brush, apply the lightest shade (Mermaid Green) to set it.

 
 Use a Q-tip for a nicer smoke.
Line your upper and bottom waterline with black eye pencil.

 
(No.9) Curl your lashes and apply your favorite mascara. I apply 3 coats of very black mascara. Don't forget to put any shimmery white eye shadow in your tear duct area to pop your eyes more.

Here are shots of the finished product:
 
Semi-closed eyes
 
Half-opened eyes
 
Full-opened eyes

So, now that you're done with your Smokey eyes, clean any fall-outs of eye shadows. In my case, I used my large powder brush again with a powder on it and I brushed out the fall-outs. 

Next thing is the rest of the face. Below is the photo of the products I've used.
 
(No.10) Apply your favorite blush on. I used Spice of NYX.
(No.11) Line your lips will natural color.
(No.12) When you do Smokey eyes, it is best to have nude lips. Apply nude lipstick. I used Blush of Revlon Colorbursts Lipstick.
(No.13) Top it off with a nude lip gloss also. Apply it in your lower middle lips then pout once.

I have no available any green tees to wear yesterday but I think this blue green tee worked anyway.

Hope this tutorial helps. Until my next post beauties.

Much love,

Jenniya