Showing posts with label Face It. Show all posts

Monday, 25 February 2013

Face It: Fuss Free Summer Look


My hubby and I went out yesterday to pick-up our iPhone unit in Globe store. Gosh! Our first unit flew to Apple in Singapore and undergone thorough inspection because we found dents and the right bottom glass hollows every time we hold it there. Finally, after almost four (4) freakin' weeks of waiting, Globe replaced our unit to a brand new one. Anyway, I came up with another look like here. Yap, because of the sweet comments you left from the "no make-up look" I've posted, I was inspired to document my look yesterday and thought of sharing it with you. Are you excited?

Well, every girl would love to hear compliments like: "did you put any make-up?" or "I like your make-up, it's simple yet you look so pretty." Of course, we want to look good without overdoing it and not obviously seeing the layers of make-up we've put on. In short, we want to look good in the simplest possible way. Most girls say it is very hard to pull a no make-up look. Okay, I count myself in. I can say it is hard because the more simple look I try to pull, the more I feel unattractive and looking washed-out and don't stand-out.

But I worry no more because I eventually learned to apply the simplest look and I can say I'm getting a pull of it using only the basic and few make-up products. Surprisingly, I love this kind of look especially now that summer is officially taking over. Well, hello to more humid weather! I can smell and feel it. Makes me long to go to the beach. Moving on, this is the season for me to skip applying foundation or BB Creams and just stick more to powders and bring "No Make-Up Look" on. Hmm... I think I am so ready now for the heat, are you?

How did I make this look? Keep reading lovelies.

Products I've used from top:
Palladium Natural Rice Powder in Natural, IN2IT waterproof eyebrow colour in ER 01 Eyebrowns, Shu Umemura Precise Volume Mascara Waterproof, IN2IT Waterproof Eyeliner in WE 06 Pearl, Bobbi Brown Eye Shadow in Nude, Revlon Colorburst in 035 Blush, & Avon Simply Pretty lip & cheek tint. 

The look I created is like a 3-in-1. I unified three (3) make-up styles: Get Blushed All-DayBigger & Brighter Eyes and No Make-Up looks into one Fuss Free Summer Look. This is an easy style because you need not have to exert an effort to do so and take note that I used only the seven (7) products as seen in the photo above. Also a travel friendly kit, don't you think? So, let's get this on.


Get Blushed All Day
This Blushed All Day Look is a perfect look this summer. I don't like catching sun here in Manila but if I'm in Boracay, I really won't mind getting toasted lol. Anyway, this will make you looked like you've caught some sun without actually having a tan. This will give you healthy and glowing cheeks. I used Avon Simply Pretty lip & cheek tint to help me fake the "all-day permanent" blush. 

I have oily skin. When my oil starts to come out after an hour, my solution to keep my face matte is the oil-control sheet. Then, after that I've got to check if my cheeks have still color because the oil will definitely melt down my powder blush. With that I have to put blush powder again and again. But with this cheek tint, I only have to apply once and it lasts throughout the day until I wash my face at night. 

How-to: (1) Apply moisturizer. Wait until it is fully absorbed by the skin. 
(2) Then, take your lip & cheek tint and apply small strokes onto cheeks levelled to your nose. My Avon tint is roll-on type, thus, the circle application. Using my ring finger, I dabbed the product gently on the same area until it fully dries and absorbed. Depending on your skin tone but I did it 3 times to achieve my desired effect. 
(3) After that, I applied Natural Rice Oil Absorbing Powder all over my face.


Bigger & Brighter Eyes
My eyes aren't that small; nor big. But mine is hooded, so, I think it make my eyes smaller in some angle. I want my eyes look bigger and brighter. They said it will make you look innocent? Like! Well, I can make it by the help of white eyeliner because it extends the whites of your eyes, thus, the illusion of bigger and whiter eyes. However, some white eyeliner will turn you looking like a clown. So, before you buy white eyeliner, read these tips first:

Tip #1. If you have fair/ lighter skin tone, you can go for white eyeliner because the effect is more natural.
Tip #2. If you have medium or morena skin tone, go find a peach shimmery color or a flesh colored eye liner because that will look more natural following your skin tone. Avoid pure white eyeliner because it will look harsh on your eyes. You aren't going to a Cosplay or something, are you?

How-to: (1) This is optional. You can skip this and go straight to (2) but if you have some nude mattes, then do this. I applied Bobbi Brown in Nude onto my eyelids. This will give my eyes a bit of depth. Also my eyelids tend to get oily, too. So, when I had it set with this matte eye shadow, the oil won't be that of a problem at least.

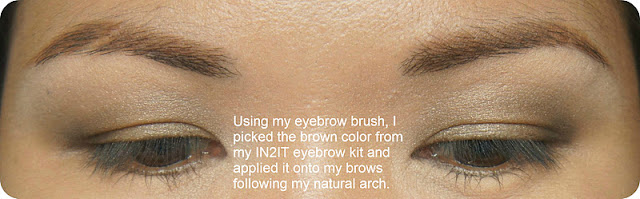
(2) Do your eyebrows. Using my eye brow brush, I combined the lightest to medium shade of my IN2IT eye brow kit and apply it from the inner brow up to just before my arch. Then, I used the darkest shade to finish my brows. I tend to darken the tail of my brows because I have few tiny hairs left in there; just to balance my brows. Remember, our eyebrow is the frame of our face.

(3) Using my eye liner brush, I picked again the darkest shade from my eye brow kit or if you have dark brown eye shadow, that will do. I lined a wing from my outer eye going in. 

(4) Then, I made thin strokes on lining my upper lash line. If you have small lid or a hooded lid like mine, you should line it very close as possible to your lashes.

(5) Apply the white eyeliner in your water line starting from the outer going in to the corner of your eyes. Then, apply it from the inner corners up to the 1/3 part of your lower lash line. Smudge it a bit. This will make your eyes look opened. This eyeliner I got from IN2IT is in Pearl. It's a flesh color or a hint of light peach. The soft shimmer shows up making your eyes looking sparkling.

(6) Lastly, use the left product on your eye liner brush and line your lower lash line starting from the outer eye going in up to 3/4 of the lash line. Then, blend it gently with the white eyeliner.

(7) Curl your lashes and apply your favorite mascara. I applied one coat only of Shu Uemura mascara.


No Make-Up Look
So, now that you've finally done the two, do not forget to apply your lip gloss or lipstick. Choose natural shades like light pink, nudes and corals. It's best to use a lipstick with moisturizer as the weather will come very hot; you don't want cracked lips are you? I used my Revlon Colorburst lipstick in Blush. The lipstick is moisturizing. Now, your No Make-Up look is complete. 

Summer look should be light weight, radiant and looking fresh. Agree?

Whoah! My eyes didn't disappear completely when I fully laughed out. The trick worked on me indeed.

By the way, I DIY-ed this cropped denim vest. I love distressing fine clothes lol!

Fuss Free look, isn't it?

This look is also suited for everyday wear to work. To those girls out there that are newly graduated and hired and still holding on with their go-to-wear of just pressed powder, cheek tint and lip gloss or tinted lip balms; give this look a try. Also to those that are new to make-ups and those that aren't brave enough to wear colors yet. This look is also best for you women working in the office, definitely, this look will give you a fresh aura. 

So, what do you think?


XX,


Follow & Like me on BloglovinFacebookTwitter & Instagram.


Monday, 18 February 2013

Face It: No Make-Up Look


How was your weekend? Last Sunday, I had a wonderful sundate with my in-laws together with my hubby. It was like a post Valentine date for all of us. We had lunch in Seaside Market (or mostly known as Dampa) along Macapagal Avenue in Pasay City. Many waiters approached and called our attention as we passed by each restaurant (if you've been there, you know what I meant of this usual scenario) but we still chose to eat in the restaurant where we had eaten before because it is more spacious there.

Oh we really enjoyed the quick buying of fresh sea foods from the market stalls right across the restaurant, did some bargaining and of course, the sumptuous lunch of fresh cooked sea foods! When it was cooked and finally served all in the table, we were surprised because there are so many that we all struggle to finish what we ordered. Haha!

If you are my follower on Instagram and Twitter, then you must have seen the photo I posted using the front camera of my iPhone but yeah, I know the photo didn't give much justice on what I was claiming of no make-up look. So, lovelies, here was my look.


What I used:
PALLADIUM Natural Rice Oil Controlling Powder
AVON Lip & Cheek Tint
NYX Lipliner in Natural
SHU UEMURA Waterproof Mascara in Black
IN2IT Eyebrow kit

I set Sunday for my skin to breathe. So I care less for my face and focus more of my attention to chit chat with my in-laws last Sunday. I skipped foundation and just apply loose powder especially when I learned that we will spend some time in MOA after lunch. I don't know if it just me but sea breeze makes my face more oily and sticky feel. I really hate it! So I made sure I'll be less conscious of my face that day. I rocked a no make-up look and for me not to get bothered of reapplying blush, AVON lip & cheek tint saved me and kept my cheeks blushed like it's been pinched all day. I also opted to apply just a lip liner to keep the whole look as natural as possible. And of course, loads of Shu Uemura mascara!

Before I end this post, let me share with you some photos on how my day went.

Meet the man behind the lens - my husband.


Before we headed home, we were able to hear the Sunday mass. As usual, the people in the church overflowed down the road. There are so many people outside and even across SMX. We just stood by our car and heard the mass from where we parked in front of SMX Convention Center.

So, that's it for now. I hope you all had a great weekend, too.


XX,


Thursday, 17 January 2013

Face It: Green Smokey Eyes


Even if I haven't determined my skin tone before;  I already love neutral and earthy colors. My love for yellow, green and brown become more intense when I determined that I fall on Warm toned. When I started to totally embrace my make-up addiction, it seemed that all things are falling into places when I also found out that my brown eyes suits colors i.e. copper, bronze, coffee, champagne, brown, beige, khaki green, royal blue, etc. that belongs to neutral & earthy colors. I was glad that my hard-earned money spent in make-ups aren't put to waste and that most of them are worth keeping for in my vanity table.

When Pantone revealed that the color of the year 2013 is Emerald, I was overjoyed. I went to my vanity table and checked my eye shadows. A grin was plastered on my face when I opened my single and palette eye shadows one by one. Oh yeah. May it be light or dark; I have enough greens. I really miss playing with my eye shadows so I took advantage of the chance as I was really in the mood to make edgy make-up. 


For my Green Smokey Eyes, I used:

Face
Etude House BB Magic Cream in Refreshing,
CLARINS Lisse Minute Base Comblante,
Palladium Rice Powder in Naturel RP06,
NYX Blush in Spice.

Eyes:
IN2IT Brow Kit,
NYX Eye Shadow Base in Skintone,
NYX single eye shadow in Highlight,
NYX single eye shadow in Mermaid Green,
NYX single eye shadow in Exotic Green
Ever Bilena single eye shadow in Cleo
IN2IT waterproof eyeliner in WE 01 All Black
SHU UEMURA Precise Volume Mascara Waterproof in Black.

Lips
Wet ' Wild Megalast in 902C Nude
NYX Megashine Lip Gloss in Beige
NYX Lipliner Pecil in 810 Natural.


I am thinking to post a tutorial for this look. Let me know. Drop a comment.


XX,


Follow & Like me on BloglovinFacebookTwitter & Instagram.


Thursday, 21 June 2012

Thursday, 1 March 2012

FOTD: Green is the color of the day by LOUJENE


Shirt by St. John's Bay

Last Sunday, I get bonded with my in-laws. I don't often see them and I get flattered when my Mom-in-law said that my skin is glowing and I'm looking fairer compared to the last time she saw me. I said that we intentionally don't go out under the sun nowadays because we wanted to get a nice line of tan this coming summer. Lol!

For today's post, I've used for the very first time a lovely make-up palette from LOUJENE - a Japanese make-up brand.

LOUJENE


For this look, below is the lists of the products that I've used.

For the face:
- Myra Daily Sun Protect Facial Moisturizer SPF 15
- Palladium Natural Rice oil-absorbing rice powder

For the eyes:
- LOUJENE 9-colors eyeshadow palette
- NYX eyeshadow base
- IN2IT eyebrow kit
- ELF eye widener pencil in Pearl
- Maybelline Hyper Curl Volum Express mascara

The eye shadows are shimmer wash and some are semi-mattes. Love!

I love earth colors!

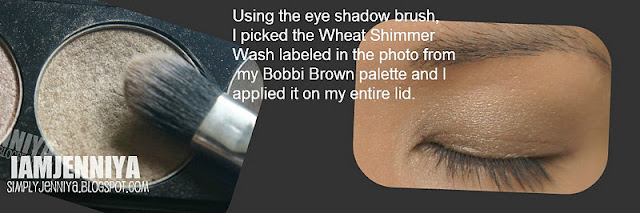
1. I applied it all over my lids up to the brow bone.
2. I applied it in the inner third of my lids just up to the crease.
3. I applied it on the outer part/ outer-V of my lid.
4. I applied it in the inner corners of my eyes on top of the ELF eye widener in Pearl.

Fyi, I applied my Bobbi Brown in Espresso to darken my outer-V.

For the cheeks:
- Avon lip & cheek tint
- NYX Blush 

For the lips:

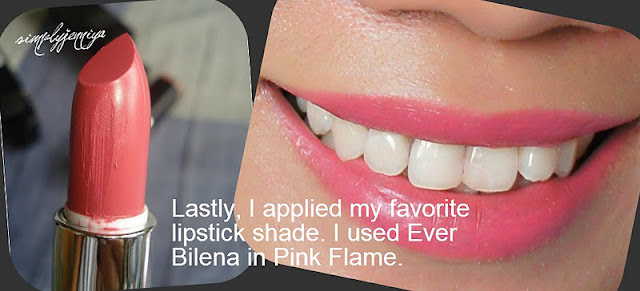
I combined the two (2) shades of the lipsticks. I applied first the Wet 'n Wild, and then I blot it with tissue. I did it twice for the Noveau Pink. Next, I applied the Ever Bilena on top of it. 

Nice result of the combi, eh?


XX,

Saturday, 14 January 2012
How-To: Dramatic Bigger Eyes


I'm back again with a make-up tutorial. I just thought of this randomly. I supposed to make a tutorial of transforming your small eyes to bigger eyes using bright eye shadows but heck, I ended up playing with my dark eye shadows that it turned out dramatic. Lols!

Dramatic Bigger Eyes
I intentionally leave my other eye undone to see how big the difference it made.

To get us started, you just need a nude color and a very dark eye shadow.

Step #1. Prep your face.
I opted to apply my daily moisturizer (Myra-E with SPF 15). After the moisturizer is fully-absorb by the skin, I pumped a little amount of the BB Cream (Etude House in Refreshing) and I applied it onto face using my slanted foundation brushI set my foundation with my favorite oil control powder (Palladium Rice Powder in Natural).

Step #2. Eyes - Base color
First, I apply my eye shadow base (NYX e/s base in Skintone) all over my lid and onto my lower lash line. Using my fluffy eye shadow brush, I applied a nude color (NYX single e/s in Highlight) all over my lid up to the brow bone.

Step #3. Eye lining
Using eye liner brush, I load a black matte eye shadow (Ever Bilena in Cleo) and lined my upper lash line. Starting a thick line from the outer going thinly inwards. I winged it a bit in the outer for a nice lift of the eyes.

Step #4. Crease
Using a bullet brush, I load it up with a dark brown eye shadow. I pointed the brush just below my brow bone or where your eye socket's higher depth, then I poked the brush in and I slowly glided the brush onto my eye socket moving inward and outward like a wiper. Take your eye blending brush and blend away the harsh edges. It will make a nice depth like you have a crease.

Step #5. Highlight
Using the fluffy eye shadow brush, I load it with white shimmering shadow (NYX  single e/s in White Pearl), and applied it in my middle eye lid, in the brow bone and in the inner corner of the eyes.

Step #6. Darken the shadow
(1) I load my bullet brush with black matte eye shadow (Ever Bilena in Cleo) and I darken my outer-V and the created crease earlier. Then, (2) using an eye liner brush, I also load it with the same black matte eye shadow starting thickly from the outer going inward up to inner 3rd only. 

Step #7. Finish the eyes
I lined my lower water line with a black eye pencil. I stroked a white eyeliner (ELF in white pearl) onto the inner corners of my eyes. For the eye brows, I used my IN2IT eye brow kit using my slanted eye brow brush.

Step #10. For the cheeks, I used my NYX Blush in Spice.
Step #11. For the lips, I used my NYX Megashine lip gloss in Beige.


This eye make-up is wearable in daytime, too. You just have to choose a not so dark shade like brown shade. I used black and darker brown in this tutorial to show the transformation of my bare eyes.

That's it. I hope you find my tutorial helpful. 


iamjenniya


Thursday, 29 December 2011

Tutorial: Simple Everyday Make-Up


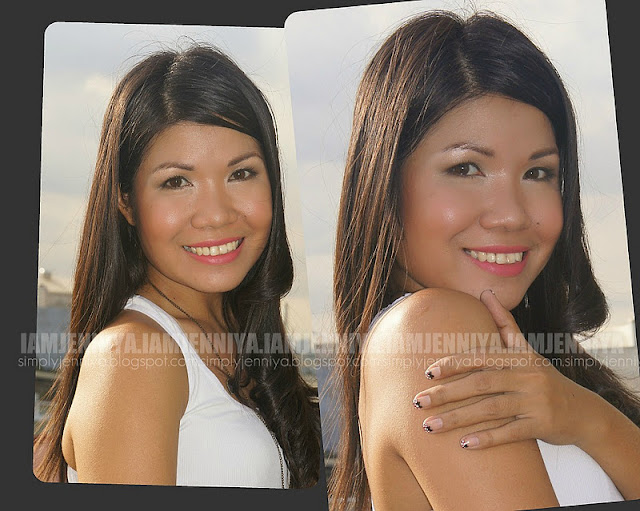
I posted the other day the ways on how I wore my basic white top and I came up with a simple make-up also to match with my outfit. Today, I am going to share with you the make-up tutorial on how I came up with this look. I actually just used two (2) color of eye shadows (a lighter shade and a dark shade) in this tutorial to justify the post title about a simple make-up.
A Simple Make-Up

Here are some products I've used in achieving this look. 

The step-by-step instructions:
Step #1. I skip with the moisturizer because I used my Etude House BB Cream in Refreshing. I squeezed out from the tube a small amount only and using my slanted foundation brush, I applied it evenly onto my face.

Step #2. I set my BB Cream by applying my IN2IT two-way foundation over it using my powder brush.

Step #3. Eyelids!
Apply the similar eye shadow color you have (it's like a mix of green & gray) using any small eye brush from the outer to the inner 3rds of your lower lash line.

Step #4. Crease!
Apply also any very dark brown eye shadow you have (provided it is matte) using a bullet brush from the outer to the inner 3rds of your lower lash line.

Step #5. Blend! Blend! Blend!

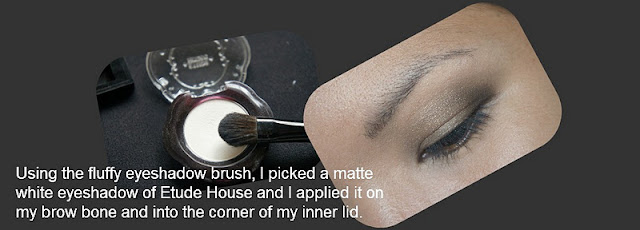
Step #6. Brow bone!

Step #7. Eye brows!

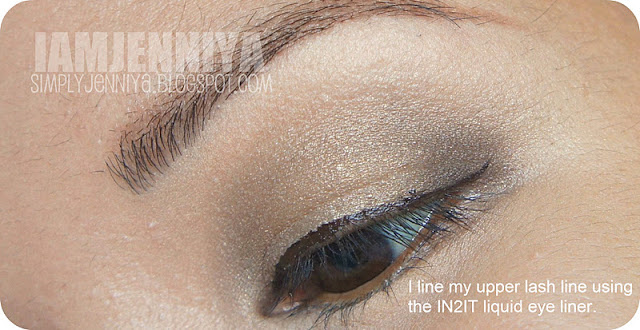
Step #8. Lash line!

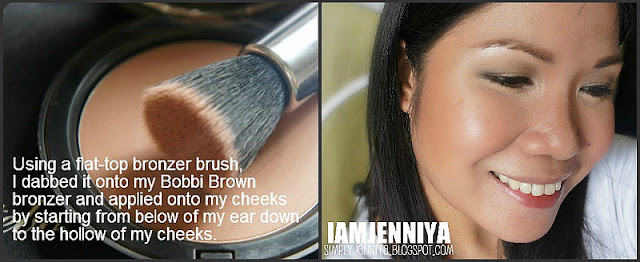
Step #9. Contour!
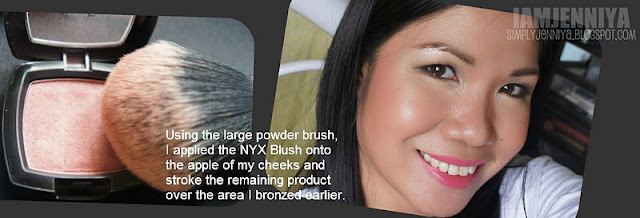
Then, bring it up by stroking at the sides of your face to create shadow that will give an illusion of slim face.. I also contoured my nose using a big eye shadow brush. Do not forget your jaw line also. To make it more natural, I stroke the remaining product in the brush lightly on my cheeks.

Step #10. Blush!

Step #11. I applied a very small amount of champagne eye shadow mixed with a Stila in Moonlight eye shadow onto the corner of my eyes to make my eyes pop more and to make my face look even brighter. 

Step #12. Curl your lashes and apply your favorite mascara. I used Maybelline Volum Express.

Step #13. Lips!

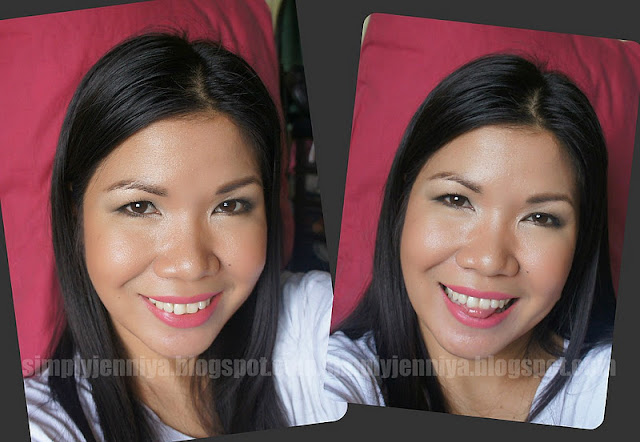
And you're done! Here are some bonus photos before I get my hair curled and get ready for the photo shoot with my hubby.

This make-up is perfect for an everyday wear to work. Skip the contouring and bronzing steps, I really find this make-up look just so quick and easy to do. Talk about NARCISSISM, I hope I didn't get you bored with all my faces. 

I hope you find my make-up tutorial helpful.

iamjenniya