Showing posts with label Bobbi Brown. Show all posts

Monday, 25 February 2013

Face It: Fuss Free Summer Look


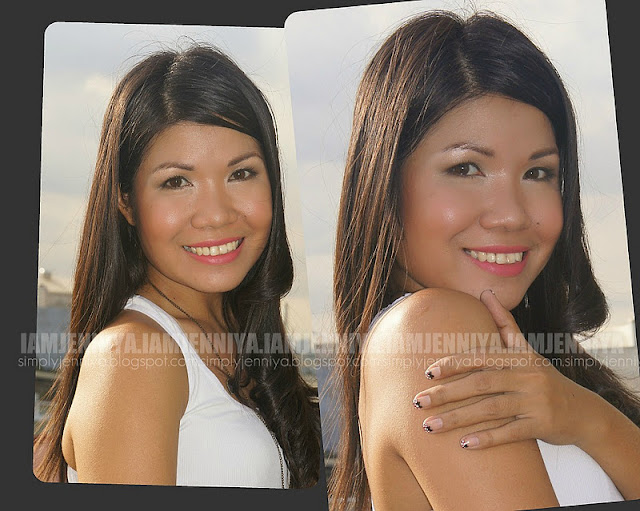
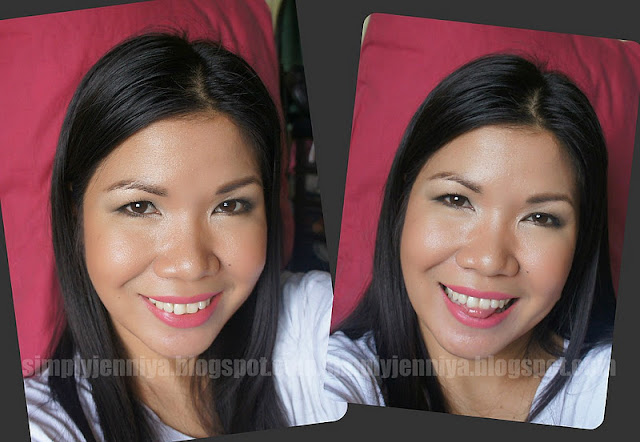
My hubby and I went out yesterday to pick-up our iPhone unit in Globe store. Gosh! Our first unit flew to Apple in Singapore and undergone thorough inspection because we found dents and the right bottom glass hollows every time we hold it there. Finally, after almost four (4) freakin' weeks of waiting, Globe replaced our unit to a brand new one. Anyway, I came up with another look like here. Yap, because of the sweet comments you left from the "no make-up look" I've posted, I was inspired to document my look yesterday and thought of sharing it with you. Are you excited?

Well, every girl would love to hear compliments like: "did you put any make-up?" or "I like your make-up, it's simple yet you look so pretty." Of course, we want to look good without overdoing it and not obviously seeing the layers of make-up we've put on. In short, we want to look good in the simplest possible way. Most girls say it is very hard to pull a no make-up look. Okay, I count myself in. I can say it is hard because the more simple look I try to pull, the more I feel unattractive and looking washed-out and don't stand-out.

But I worry no more because I eventually learned to apply the simplest look and I can say I'm getting a pull of it using only the basic and few make-up products. Surprisingly, I love this kind of look especially now that summer is officially taking over. Well, hello to more humid weather! I can smell and feel it. Makes me long to go to the beach. Moving on, this is the season for me to skip applying foundation or BB Creams and just stick more to powders and bring "No Make-Up Look" on. Hmm... I think I am so ready now for the heat, are you?

How did I make this look? Keep reading lovelies.

Products I've used from top:
Palladium Natural Rice Powder in Natural, IN2IT waterproof eyebrow colour in ER 01 Eyebrowns, Shu Umemura Precise Volume Mascara Waterproof, IN2IT Waterproof Eyeliner in WE 06 Pearl, Bobbi Brown Eye Shadow in Nude, Revlon Colorburst in 035 Blush, & Avon Simply Pretty lip & cheek tint. 

The look I created is like a 3-in-1. I unified three (3) make-up styles: Get Blushed All-DayBigger & Brighter Eyes and No Make-Up looks into one Fuss Free Summer Look. This is an easy style because you need not have to exert an effort to do so and take note that I used only the seven (7) products as seen in the photo above. Also a travel friendly kit, don't you think? So, let's get this on.


Get Blushed All Day
This Blushed All Day Look is a perfect look this summer. I don't like catching sun here in Manila but if I'm in Boracay, I really won't mind getting toasted lol. Anyway, this will make you looked like you've caught some sun without actually having a tan. This will give you healthy and glowing cheeks. I used Avon Simply Pretty lip & cheek tint to help me fake the "all-day permanent" blush. 

I have oily skin. When my oil starts to come out after an hour, my solution to keep my face matte is the oil-control sheet. Then, after that I've got to check if my cheeks have still color because the oil will definitely melt down my powder blush. With that I have to put blush powder again and again. But with this cheek tint, I only have to apply once and it lasts throughout the day until I wash my face at night. 

How-to: (1) Apply moisturizer. Wait until it is fully absorbed by the skin. 
(2) Then, take your lip & cheek tint and apply small strokes onto cheeks levelled to your nose. My Avon tint is roll-on type, thus, the circle application. Using my ring finger, I dabbed the product gently on the same area until it fully dries and absorbed. Depending on your skin tone but I did it 3 times to achieve my desired effect. 
(3) After that, I applied Natural Rice Oil Absorbing Powder all over my face.


Bigger & Brighter Eyes
My eyes aren't that small; nor big. But mine is hooded, so, I think it make my eyes smaller in some angle. I want my eyes look bigger and brighter. They said it will make you look innocent? Like! Well, I can make it by the help of white eyeliner because it extends the whites of your eyes, thus, the illusion of bigger and whiter eyes. However, some white eyeliner will turn you looking like a clown. So, before you buy white eyeliner, read these tips first:

Tip #1. If you have fair/ lighter skin tone, you can go for white eyeliner because the effect is more natural.
Tip #2. If you have medium or morena skin tone, go find a peach shimmery color or a flesh colored eye liner because that will look more natural following your skin tone. Avoid pure white eyeliner because it will look harsh on your eyes. You aren't going to a Cosplay or something, are you?

How-to: (1) This is optional. You can skip this and go straight to (2) but if you have some nude mattes, then do this. I applied Bobbi Brown in Nude onto my eyelids. This will give my eyes a bit of depth. Also my eyelids tend to get oily, too. So, when I had it set with this matte eye shadow, the oil won't be that of a problem at least.

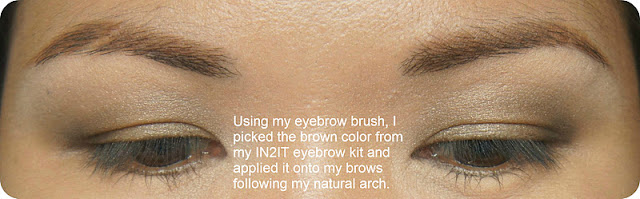
(2) Do your eyebrows. Using my eye brow brush, I combined the lightest to medium shade of my IN2IT eye brow kit and apply it from the inner brow up to just before my arch. Then, I used the darkest shade to finish my brows. I tend to darken the tail of my brows because I have few tiny hairs left in there; just to balance my brows. Remember, our eyebrow is the frame of our face.

(3) Using my eye liner brush, I picked again the darkest shade from my eye brow kit or if you have dark brown eye shadow, that will do. I lined a wing from my outer eye going in. 

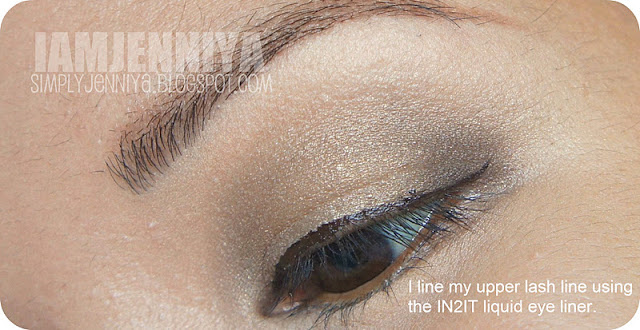
(4) Then, I made thin strokes on lining my upper lash line. If you have small lid or a hooded lid like mine, you should line it very close as possible to your lashes.

(5) Apply the white eyeliner in your water line starting from the outer going in to the corner of your eyes. Then, apply it from the inner corners up to the 1/3 part of your lower lash line. Smudge it a bit. This will make your eyes look opened. This eyeliner I got from IN2IT is in Pearl. It's a flesh color or a hint of light peach. The soft shimmer shows up making your eyes looking sparkling.

(6) Lastly, use the left product on your eye liner brush and line your lower lash line starting from the outer eye going in up to 3/4 of the lash line. Then, blend it gently with the white eyeliner.

(7) Curl your lashes and apply your favorite mascara. I applied one coat only of Shu Uemura mascara.


No Make-Up Look
So, now that you've finally done the two, do not forget to apply your lip gloss or lipstick. Choose natural shades like light pink, nudes and corals. It's best to use a lipstick with moisturizer as the weather will come very hot; you don't want cracked lips are you? I used my Revlon Colorburst lipstick in Blush. The lipstick is moisturizing. Now, your No Make-Up look is complete. 

Summer look should be light weight, radiant and looking fresh. Agree?

Whoah! My eyes didn't disappear completely when I fully laughed out. The trick worked on me indeed.

By the way, I DIY-ed this cropped denim vest. I love distressing fine clothes lol!

Fuss Free look, isn't it?

This look is also suited for everyday wear to work. To those girls out there that are newly graduated and hired and still holding on with their go-to-wear of just pressed powder, cheek tint and lip gloss or tinted lip balms; give this look a try. Also to those that are new to make-ups and those that aren't brave enough to wear colors yet. This look is also best for you women working in the office, definitely, this look will give you a fresh aura. 

So, what do you think?


XX,


Follow & Like me on BloglovinFacebookTwitter & Instagram.


Thursday, 29 December 2011

Tutorial: Simple Everyday Make-Up


I posted the other day the ways on how I wore my basic white top and I came up with a simple make-up also to match with my outfit. Today, I am going to share with you the make-up tutorial on how I came up with this look. I actually just used two (2) color of eye shadows (a lighter shade and a dark shade) in this tutorial to justify the post title about a simple make-up.
A Simple Make-Up

Here are some products I've used in achieving this look. 

The step-by-step instructions:
Step #1. I skip with the moisturizer because I used my Etude House BB Cream in Refreshing. I squeezed out from the tube a small amount only and using my slanted foundation brush, I applied it evenly onto my face.

Step #2. I set my BB Cream by applying my IN2IT two-way foundation over it using my powder brush.

Step #3. Eyelids!
Apply the similar eye shadow color you have (it's like a mix of green & gray) using any small eye brush from the outer to the inner 3rds of your lower lash line.

Step #4. Crease!
Apply also any very dark brown eye shadow you have (provided it is matte) using a bullet brush from the outer to the inner 3rds of your lower lash line.

Step #5. Blend! Blend! Blend!

Step #6. Brow bone!

Step #7. Eye brows!

Step #8. Lash line!

Step #9. Contour!
Then, bring it up by stroking at the sides of your face to create shadow that will give an illusion of slim face.. I also contoured my nose using a big eye shadow brush. Do not forget your jaw line also. To make it more natural, I stroke the remaining product in the brush lightly on my cheeks.

Step #10. Blush!

Step #11. I applied a very small amount of champagne eye shadow mixed with a Stila in Moonlight eye shadow onto the corner of my eyes to make my eyes pop more and to make my face look even brighter. 

Step #12. Curl your lashes and apply your favorite mascara. I used Maybelline Volum Express.

Step #13. Lips!

And you're done! Here are some bonus photos before I get my hair curled and get ready for the photo shoot with my hubby.

This make-up is perfect for an everyday wear to work. Skip the contouring and bronzing steps, I really find this make-up look just so quick and easy to do. Talk about NARCISSISM, I hope I didn't get you bored with all my faces. 

I hope you find my make-up tutorial helpful.

iamjenniya

Monday, 21 February 2011

Face It: BRIGHT SULTRY LOOK

So, what eye make-up should you wear with a gray dress? 

Believe me, if you are not confident enough in putting on your make-up like me especially in matching it with your outfit; you'll end up goggling for tips lol! Okay, so I found out that gray is a neutral color. Some said that you can wear any eye make-up, some said it's best to go for a smokey eye look, a purple look, a gray/ silver eye make-up, etc.

I end up with this look though:
 

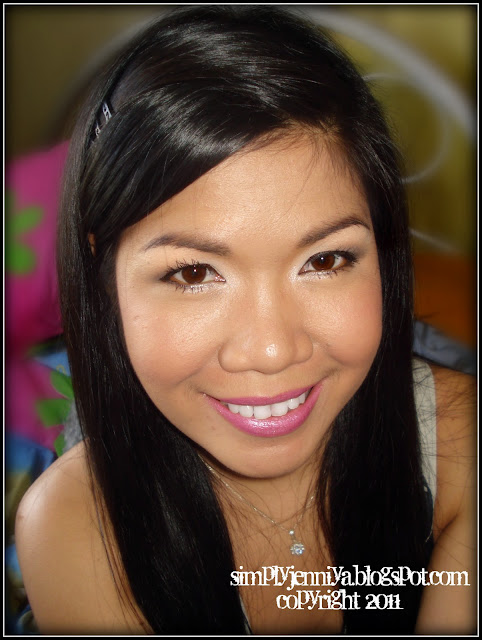
The occasion I've attended to was held on daytime so I chose a more neutral look but sultry. Honestly, I received compliments with this make-up. It's so flattering most especially when the compliment came from my B's mom!

Bright Sultry Eye Make-Up

Products used:
Etude House Magic BB Cream in Refreshing
Bobbi Brown Stonewashed Nudes Palette
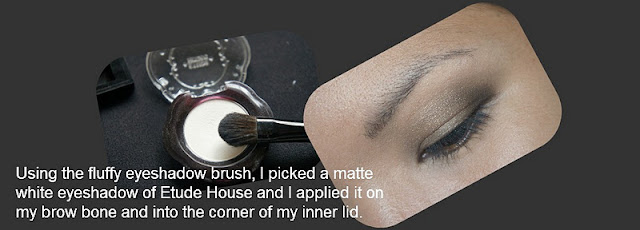
Etude House Single Eye Shadow in White
Stila Eye Shadow in Moonlight
NYX Blush in Spice
Wet n Wild in Retro Pink

Other products I've used but not in the photo:
Natural Rice Oil Absorbing Powder
IN2IT Eye Brow Kit
Maybelline Volum Express Mascara
NYX Lip Liner in Rose
MAC Sheer Vision Gloss


The STILA in Moonlight did a lot of brightening in my eyes. I really love this eye shadow. I just used this in my inner corners and tear duct areas. It is so pigmented; creamy and very sparkly.

Smile always and stay tuned.


Jenniya


Wednesday, 16 February 2011

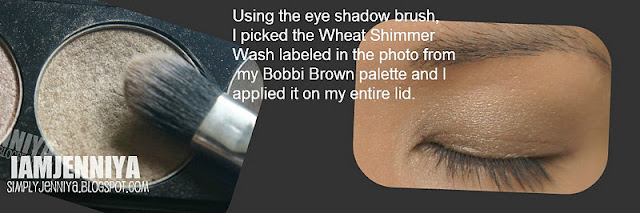
Face It: BOBBI BROWN SHIMMER WASH + GEL LINER


Hello! Hello! 
Here's an EOTW again for you beauties. Iwore this simple eye make-up just this week when we had an appointment in Makati. It was a quick prep for me when I did this look.
On my lips: WnW in Cherry Frost, click post here.

Product I used:
 
 
Bobbi Brown Long Wear Gel Eye Liner in Sepia Ink.


Till next EOTW.


Jenniya


Tuesday, 25 January 2011

Eye Of The Week: BASIC TO WARM TOUCHES TO FOREST GREEN EYE LOOKS (Series 1)


Since the day I started using eye glasses, I got inspired to do eye make-up that will suit my new look. I'm concentrating on my eyes, of course. I used my latest "babies" - Elianto Colour Studio and Etude House to experiment my new eye looks. I'm so happy with how the Etude House eye shadow does its job. I was disappointed for Elianto but no big deal though. So, here are some photos that I want to share with you guys. These are the ones that been keeping me busy nowadays lols!

Eye Of The Week - Look 1: BASIC
 
 
Products used:
o NYX Eye Shadow Base in Skintone. 
o Bobbi Brown Eye Shadow in Nude.
 o Bobbi Brown Long Wear Gel Eye Liner in Sepia Ink.
o Nichido  Colour Intense Eye Pencil in Vivid Turquoise.
o IN2IT Mascara in Black.

Eye Of The Week - Look 2: WARM TOUCHES


Products used:
o NYX Eye Shadow Base in Skintone.
o Etude House Single eye shadows in White.
o Etude House Single eye shadows in Pale Light Blue.
o NYX Jumbo Eye Pencil in Milk.
o MAC Quad Eye Shadow in Garcon Gray & Bistro.
o Bobbi Brown Long Wear Gel Eye Liner in Sepia Ink.
o Nichido Colour Intense Eye Liner in Turquoise & Deep Plum.
o IN2IT Mascara in Black.

Eye Of The Week - Look 3: FOREST GREEN LOOK
 
 
Products used:
o NYX Eye Shadow Base in Skintone.
o Etude House Single eye shadows in White.
o MAC Quad Eye Shadow in Bistro.
o Elianto Colour Studio in Nile Green.
o Elianto Colour Studio in Young Lemon.
o Elianto Colour Studio in Celadon Green.
o IN2IT Liquid Eye Liner in Black.
o IN2IT Waterproof Eye Liner in Pearl.
o IN2IT Mascara in Black.

I've decided to make a series of EOTW (Eye of The Week) every month. I will do 2-3 eye look every week until I get tired doing it, lols! So, expect a load of different eye make-ups. I already started this week. Okay, so that's my EOTW's (Eye of The Week) for now. Hope you had fun. Until my next post beauties!

Smile always and stay tuned.

XX,

Jenniya

Sunday, 23 January 2011

HOW TO'S: HOW I RESTORED MY DRIED-UP BOBBI BROWN GEL EYE LINER

 Bobbi Brown Long-Wear Gel Eye Liner in Sepia Ink.

I thought I cannot use again my Bobbi Brown Gel Eye Liner since it got dried up already. But I never bother to think to shoot it into the trash bin. Thank God I have this attitude of keeping stuffs instead of throwing it away. I got excited to know that I can still restore my dried gel liner or I can still extend its shelf life when I stumbled on Dollface Cosmetics site and have seen the simple tutorial on restoring your gel liner.

All you need to do is get the following:
o Eye Drops
o Toothpick or Popsicle stick
o Tissue 
o Of course, your dried-up gel liner.

Step 1. Do not face towards electric fan or avoid the windy area. Open your gel liner.
See that space in the right inside the bottle? That's how dry it is.

Step 2. Using any eye drops except contact lens solutions, drop 2 or 3 depending on the dryness of your gel liner. You can add more drops as you go along if needed. In my case, I immediately give it 4 drops.
 

Step 3. Using the toothpick, I slowly smashed the gel. Mix it until the consistency gets creamy.
 

Step 4. Take the tissue and press down the gel on the bottle. Please don't use a thin issue that can easily torn coz in my case, my tissue was thin so when I pressed down the gel, I left some tiny parts of torn tissue in the gel which I easily took off using my tweezer.

Step 5. Clean the mouth of the bottle. Take the cap and close it tightly and store it in mod temperature.

Voila! You're done! Isn't it so quick and pretty easy to do? I've done it in less than 10 minutes. I really enjoyed doing it.

Time to test! I applied my restored gel liner onto my eye line starting from  the outer corner or whatever works for you. Some starts at their inner corner all the way out. Excuse my very oily lids! I didn't put any powder on prior to application hehehe. I'm just excited to test it immediately. Wow! I love again my gel liner. It's very easy to line my eyes (I used a slanted eye liner brush) and it glides on very smoothly. I'm so happy!
 
I intentionally put the gel liner all over my eye line and elongate the wing for a cat-eye look. So perfect for clubbing noh?

Later that day, my B and I headed out around 3:00 pm. I used my restored gel liner and went home after 9 hours. I am impressed on how the gel stays intact. I didn't retouch or put on face powder but I only used blotting paper on my T-zone area, so definitely the eyes area weren't seriously blotted.

 
I just applied the gel liner on the outer 3rd corner of my eye line. I just wanted to open my eyes and also coz I've worn my Wet 'n Wild Cherry Frost so I don't want to be looked like a clown hehehe.

Here's the photo of Before and After 9 hours:
 You can see the difference on my skin. The Before photo (left); not yet oily and the After 9 hours photo (right) with my very oily skin. See? The gel liner still stays intact. Doesn't smudge! It still does the same job like it was brand-new. Yey!

So, why spending another hundreds or thousand of bucks to buy for new one? Go get your dried-up gel liner and start restoring it now and SAVE money! Until my next post beauties.

Smile always and stay tuned.

XX,

Jenniya